All-Wooden Wind Generator
Built in a day
|
Our article about this silly Wooden Windmill was published in issue #88 (April/May 2002) of Home Power Magazine! You can Download the entire Wood 103 article HERE in .PDF format. You'll need Acrobat Reader to view it. The article goes into much more detail than the text below...Please refer to it first!This page is all about a rather silly, quick project where in about 1 day I built a small wind generator using the following items, and nothing else.... (1) Wood (2) Copper wire (3) Surplus Neodymium magnets (4) Dirt (5) 10" piece of 3/8" steel shaft (6) Two bolts, but these are optional. ...and that's all, unless we count glue, and linseed oil which I used for finishing. Initially the project started out to simply be an alternator experiment. Once I had the armature finished and a couple of the coils wound on the stator, I realized it was definitely going to be a successful one, so I decided to build it into a small wind generator. Mostly simple tools were used, although a band saw, wood lathe, and drill press came in pretty handy.
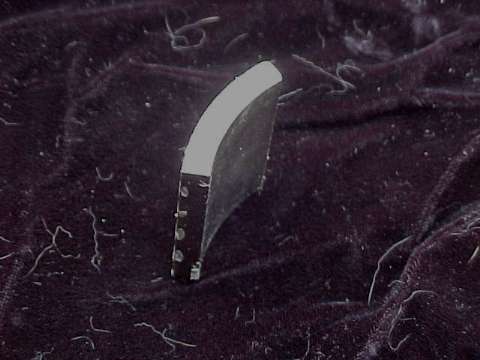
Pictured above is one of the magnets I used. These are surplus magnets from computer hard drives, one of my favorites for alternator experiments. They are about 1.75" long, 1.4" wide, and a quarter of an inch thick. 8 of them will fit together to make a ring. We no longer have these magnets in stock. They were surplus, they are sold out, and we can't get any more. But this design could easily be adapted to use different size or shape NdFeB magnets.
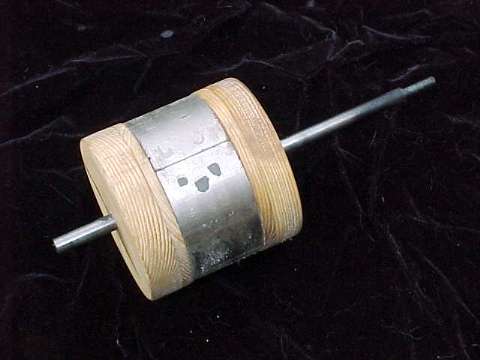
Above you can see the armature for the alternator. I simply laminated wood until I felt it was thick enough to hold the magnets securely. After they were glued together, I lathed the armature down to match the diameter of a ring of 8 magnets, I cut a slot so the magnets could be pressed/glued in. Epoxy is probably the best glue for this. In the center I drilled a hole and glued/pressed in the 3/8" diameter shaft. Keep in mind, this alternator has 8 poles, and the magnets must have alternating poles facing out.
Pictured above you see the wooden pillow block bearings. I simply drilled a hole, slightly under 3/8" diameter, and then using a gas stove, heated the shaft to almost red hot, and forced it through the holes. This makes for a good tight fit, and it serves to harden the wood, and the inside of the holes has a layer of carbon, which makes for a better bearing. These bearings are from pine, certainly a harder wood would work much better! In the top of the pillow blocks I drilled a small hole so that the bearings could be oiled/greased. Once the alternator was assembled, there was no play in the shaft at all, and it turned freely. Even after several hours of hard running, the bearings are holding up well. It's interesting information, although I would certainly encourage anybody building a windmill to use steel ball bearings. I just did wooden ones for the sake of fun, and simplicity. Odds are, on a slow running machine, like a slow water wheel, wooden bearings, properly made could last for years. This is actually a high speed windmill and I should think these would wear out quickly.
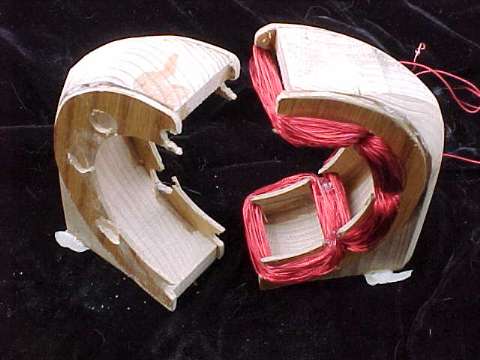
The stator, on which the coils are wound was cut from two pieces of 2" X 4" lumber. The inner diameter is 1/2" larger than that of the armature, and to the sides are thin plywood pieces with holes drilled for winding the coils. Inner diameter of the plywood pieces is only slightly larger than the diameter of the armature. This allowed for "hollow coils" into which I would have a "dirt" core to attract the magnetic field through the coils. These coils are wound with #22 AWG enameled copper wire, each coil is 100 turns. The coils are wound in opposite directions.
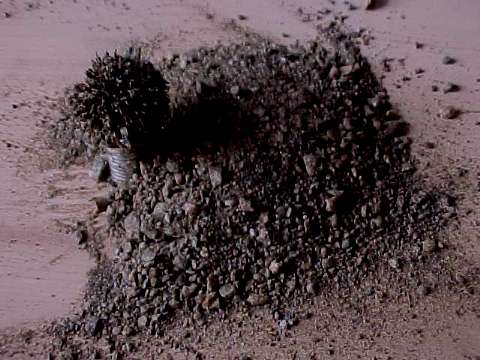
I dragged a magnet around in the dirt of my driveway, so that it would attract the magnetite sand. Pictured above you can see the pile I used, with a stack of magnets demonstrating its magnetic properties.
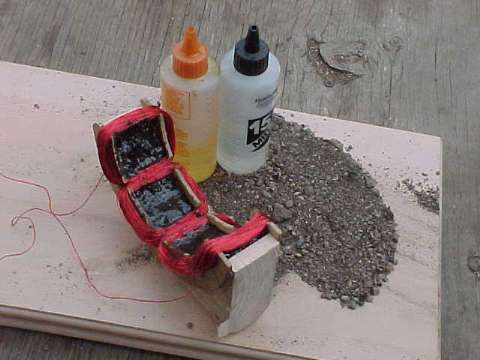
The dirt was mixed with epoxy, so that I had a thick paste. I simply spooned it inside the hollow space in the stator. This makes for a reasonable core, and although it does not work nearly as well as steel laminates, it's much easier. Making steel laminates is a nearly impossible task without significant time and tooling. The magnetite paste does a good job of attracting the magnetic field, and is non-conductive so eddy currents are not a problem.
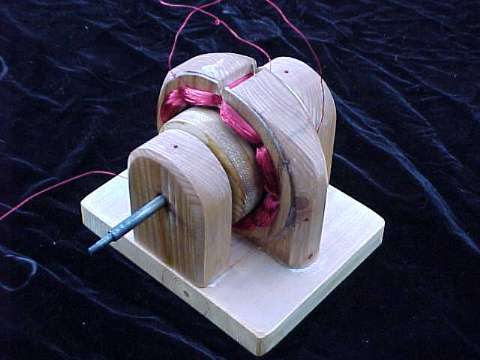
The completed alternator! I was real surprised by the performance. I could easily spin it up with my fingers to produce over 12 volts. Attaching a cordless drill to the shaft, it would light up a 25 watt 12 volt light bulb easily! Although this may not seem breath taking, I thought it was, considering the simplicity of the project! It was at this point I decided it deserved a windmill for testing!
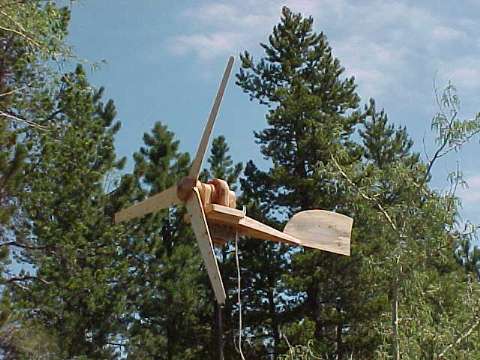
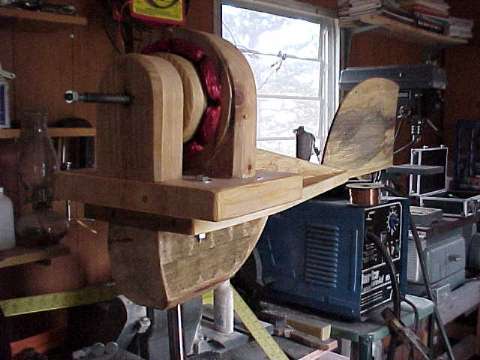
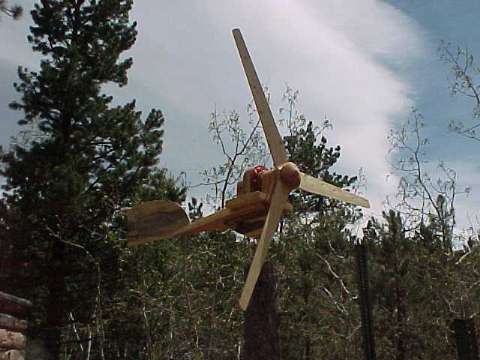
To stay with the "style" of the project I decided to build the whole windmill out of wood, it's a fairly simple design and should be self explanatory. It's glued and pinned, with wooden dowels, no bolts are used except to bolt the alternator on it. I cheated there.
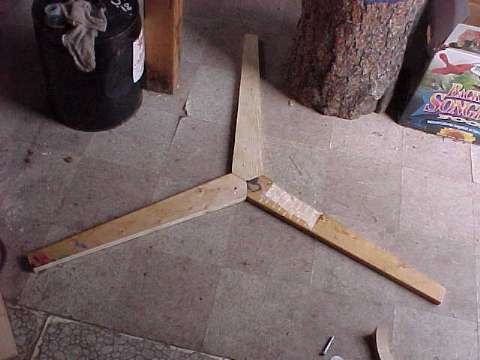
The prop is wooden, made from 1" X 4" lumber. Each blade is 3.5" wide at the base, 2.5" at the tip, and 2' long, for a total diameter of 4 feet. The pitch of the blade is 10 degrees at the hub, and 6 degrees at the tip. The hub is simply made from 2" thick wood, and glued to the shaft with epoxy. The blades are held on by one small nut at the end of the shaft, and several wooden pins. So far its held up well! Hope I never feel like taking it apart, because it would be nearly impossible...
So there it is, all finished up! I took it for a test drive in the model A Ford. I didn't want to break it, so I never took it over 25 miles per hour, but it seems to perform well (considering). In a 25 mph wind it produces about 60 watts (5 amps into a 12 volt battery), so I think I can give it an optimistic rating of 100 watts...not bad for a 1 day project made entirely of wood. Obviously, it's not made to hold up over the long term, it was merely a fun little test, but I think the alternator provides some interesting data. I feel pretty sure now that with little work one could definitely build a very useful alternator completely from scratch. By simply increasing the diameter some one could get a LOT more output from a very similar machine. Of course, using better bearings would be wise, but I like the use of wood, because it is a material which is widely available, and easily worked with the simplest of tools. Thanks for dropping in and letting me show off this silly windmill! |